4/10 Shading with Pencils 1 (Preview)
Shading with Pencils 1
Exploring different grades of pencils to bring tone and volume to an object.

LESSON PREPARATION
Getting ready to view the lesson
If you are watching the video tutorial on a computer (eg laptop, interactive whiteboard, digital projector) you can view the PDF resources on the screen.
If you are watching the video tutorial on a television, you may want to print the Workshop PDF on this page ahead of time, from your computer.
This lesson, Still Life 4/10, contains the following:
Still Life 4/10 Lesson Overview
Still Life 4/10 Activity
Still Life 4/10 Extension
Still Life 4/10 Posters (available in PDF)
These are posters of the finished artworks as created in the episode. You can choose to view this on the screen or whiteboard, you can print in black and white, or colour, or all of the above.
MATERIALS USED IN THIS LESSON
An assortment of graphite pencils, 4H – 8B, graphite stick, kneadable and plastic/vinyl erasers


EQUIPMENT USED IN THIS LESSON
Drawing board, clips, easel and spot light, simple still life.


SUBJECTS USED IN THE VIDEO LESSON
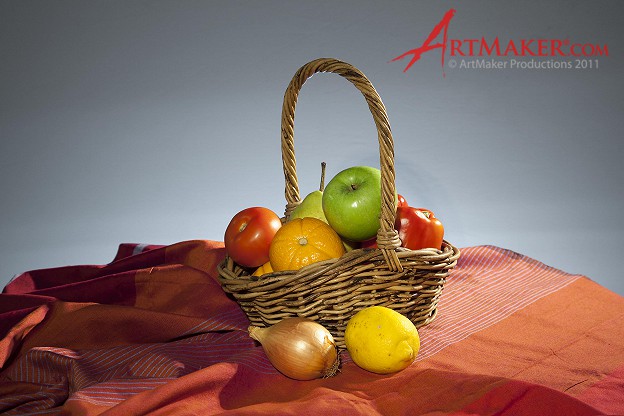
Assortment of fruit; e.g. Lemons & Oranges, Large and Medium sized bottle. Kettle, Jug.
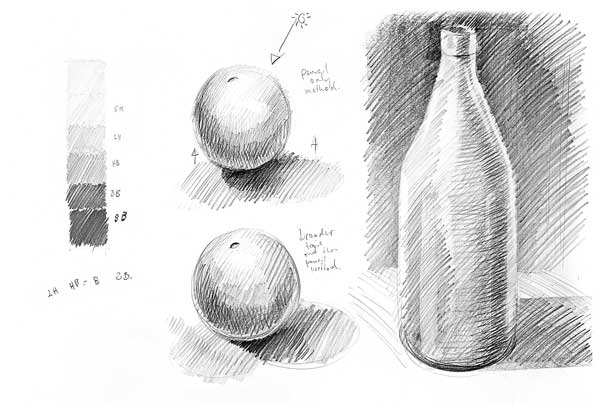
1. Start with the pencil on its side, this allows a soft line that explores the shapes of the objects, an HB or harder pencil, e.g. 2H or 4H
2. Plan on using a range of pencils, 5H provides information in the high light areas, and down to 3B or even 8B to create strong dark tones.
3. Start with the soft side your pencil and end with sharper crisper finish lines by using pencils more towards their point.
4. Hold your pencil closer to the point for drawing and shading smaller areas and further back to create wider arcs for bigger areas.
5. Shading is a language, and there are a number of successful techniques to describe light and volume, and direct your viewer’s eyes to the subject.
6. Establish the direction of the light source, an arrow will help, map out the outline of the objects very lightly,
7. As a rule we may notice a high-light on top of a ball, a big band of shadow on the side and then a reflected light glow in the shadows of light bouncing up off the table. Where the ball touches the table it is very dark, but we should use a different stroke direction to mark the shadow tone of the table surface.
8. Don’t forget to include the shadow at the same time as the object, the shadow is the glue that sticks our forms to the table.
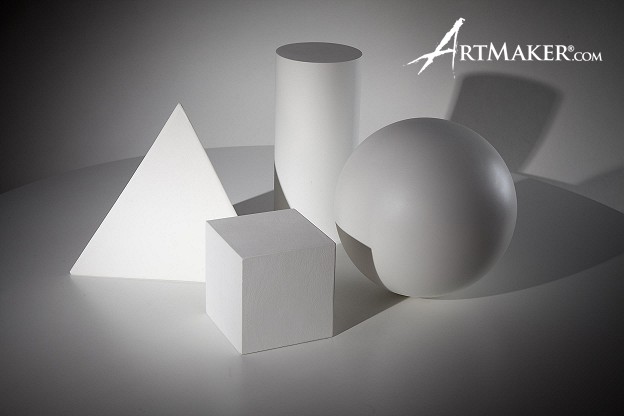
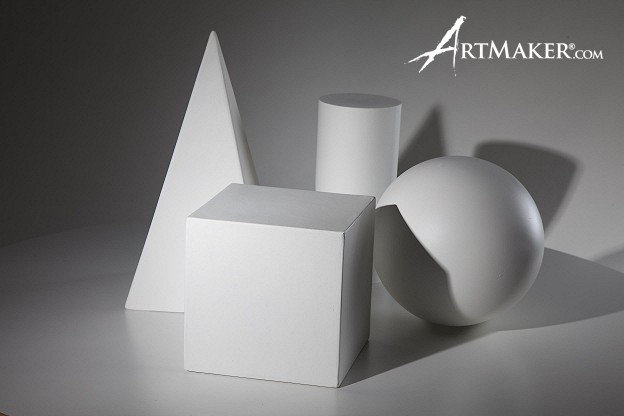
9. As an exercise, reduce a cylinder to planes, as if its cross section were an octagon , shade the panels of the cylinder in tone using grades of pencils.
10. Neatly drawn parallel shading creates a plane of simple tone. If we introduce a second direction over this, we can create a visual curve or bend in the form. Cross hatching is a fundamental of tonal drawing.
11. The general effect of this shading is to create volume, and while valid in its own right, can be a little ‘mechanical’ for round forms.
12. We can soften any ‘wicker basket’ effect by adding diagonal shading over the rough effect, to soften the hatching and unify the drawing.
13. A second method of the above is to place the diagonal shading down first and place the directional hatching in last.
15. A small variation on this technique is to place down tone with the side of a graphite stick, then place single direction shading into that.
16. Where there is a need to bring objects forward, you can add more directional hatching to encourage the turn and clarity to create the feeling of depth.
17. Not all areas of larger pictures need to be developed, background objects can be left as simple shapes, filled with a plane of shading, with no contrast to help keep them in the background.
Set up a still life that includes a cylinder and some sphere shapes, oranges and lemons for example. Keep your still life either white or single light colour, this allows us to see the tone or values. Choose a selection of sharpened graphite pencils, from 2H through to 6B and starting lightly with your 2H and finish with the dark 6B where needed.
1. Remember to draw the cast shadows, they provide lots of information and help ‘glue’ the objects to the table.
2. Draw two objects in transparency, one forward one back and create space by leaving the back object under-drawn.
3. Set up a strong spot light on a group of oranges which are balanced on each other, draw with transparency and shade using firstly graphite on its side and then pencils, diagonal parallel lines first and then a second direction on the closest one.
4. Using the same setting of oranges, place in only diagonal shading, starting with an HB on its side for soft outlines and initial shadows use a 4H -2H for the bright areas and 2B- 6B for the darker areas, keeping all the lines going in the same direction, this produces a soft tonal drawing.
5. Producing a tone or values chart helps see tone, draw a six or eight square strip and starting with a hard 4H pencil for the light work your way through the grades to 8B at black.
6. Group together several objects and draw with transparency, letting the shading solidify the objects, apply different directions and full contrast to only one object of your choice.
Video Tutorial


Download the PDF of this Workshop